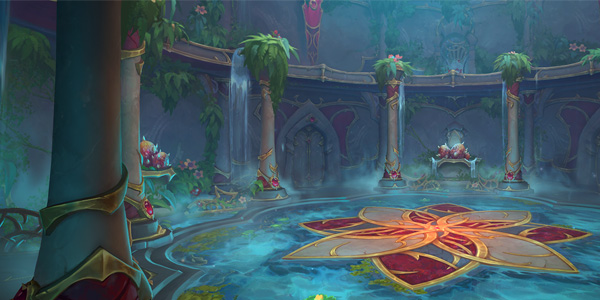
Dragonflight
Ruby Life Pools
Timer 28 min3 bossesA returning Dragonflight Season 1 dungeon, retuned and softened for Season 2 — rated lower-middle difficulty within the season.
Located in the southeastern Waking Shores (60.0, 75.7), reachable directly from the Timeways portal room in Silvermoon. The timer is 28 minutes — the shortest in Midnight Season 2 — so while the three-boss layout keeps the dungeon short in absolute terms, a single trash-pack accident immediately shows up on the timer. The original was infamous for one-shot Hailbomb deaths and dangerous caster packs, but the Season 2 version received a broad softening retune. That said, fire and frost ground effects keep accumulating throughout the dungeon, so on high keys floor management and movement are survival.
Researched early in the season. Unconfirmed details are marked as such in the text.
Trash
| Must-Interrupt — Spell | Caster |
|---|---|
 IceboltMust be interrupted. Top kick-priority pack of section 1. IceboltMust be interrupted. Top kick-priority pack of section 1. | Flashfrost Chillweaver |
 Ice ShieldHighest priority interrupt or enrage dispel — left alone it keeps the whole pack alive far longer. Ice ShieldHighest priority interrupt or enrage dispel — left alone it keeps the whole pack alive far longer. | Flashfrost Chillweaver |
 Tectonic SlamReworked in Season 2 and less punishing, but still deals party-wide damage — interrupt or stun when possible. Tectonic SlamReworked in Season 2 and less punishing, but still deals party-wide damage — interrupt or stun when possible. | Flashfrost Earthshaper |
 Fiery BlastTargets the tank — top kick priority in section 2. Fiery BlastTargets the tank — top kick priority in section 2. | Blazebound Destroyer |
 Thunder BlastInterrupt this. Lightning Storm is handled with defensives instead. Thunder BlastInterrupt this. Lightning Storm is handled with defensives instead. | Tempest Channeler |
 Storm BoltHandle with a kick rotation. Storm BoltHandle with a kick rotation. | Ruinous Stormbringer |
 Frigid ShardTank-targeted frost cast, interruptible as of Season 2 — add it to the kick rotation. Frigid ShardTank-targeted frost cast, interruptible as of Season 2 — add it to the kick rotation. | Melidrussa Chillworn (boss 1) |
 Roaring BlazeAssign an interrupter alongside the priority swap to the elemental. Roaring BlazeAssign an interrupter alongside the priority swap to the elemental. | Blazebound Firestorm (elemental summoned by Kokia) |
Dispels
- Primal Chill — magic dispel. Stacked by Infused Whelp melee attacks; 5 stacks freeze (stun) the target, so dispel just before the fifth stack.
- Ice Shield — enrage dispel (or interrupt). Highest-priority handling on Chillweaver packs.
- Rolling Thunder — Thunderhead's DoT debuff. Dispelling everyone at once spikes the healing load, so stagger dispels one player at a time.
- Stormslam nature-damage-taken debuff — magic dispel. Core to tank survival on the final boss; dispel immediately on every stack.
Section 1 — Entrance to the Infusion Chamber (before Melidrussa)
- The main threats are the Flashfrost caster packs and the dragon eggs on the ground.
- Flashfrost Chillweaver: Icebolt must be interrupted, and Ice Shield is the highest-priority interrupt/dispel — left alone it keeps the whole pack alive. Top kick priority of this section.
- Flashfrost Earthshaper: Tectonic Slam — reworked in Season 2 and less punishing, but still deals party-wide damage, so interrupt or stun when possible.
- Dragon eggs: approaching an egg hatches an Infused Whelp. Whelps stack Primal Chill, which freezes (stuns) at 5 stacks. As of Season 2 the stacks come from melee attacks, so the tank soaks them — the healer rations the magic dispel on the tank and breaks the debuff just before 5 stacks.
- Primal Juggernaut (melee elite, CC immune): dodge the Excavating Blast ground effect and use a defensive for the Crushing Smash tank hit.
- Miniboss Defier Draghar — Steel Barrage: tank-targeted channel that spawns ground vortexes; everyone dodges.
- Miniboss Defier Draghar — Blazing Rush: charge at a random target — the target leads it toward the outside of the party or a wall to minimize melee downtime.
- Assign Ice Shield and Icebolt kicks in advance.
- Do not spread out next to eggs.
Section 2 — The Climb to the Ruby Overlook (before Kokia)
- Fire pack section. Kokia only activates once the four nearby Blazebound Destroyers are killed.
- Blazebound Destroyer (CC immune): Inferno is unavoidable party-wide damage — healer cooldowns ready. Fiery Blast targets the tank — top kick priority. On death it casts Burnout — immediately leave the 20-yard radius around the corpse.
- Primalist Flamedancer: Flame Dance cannot be interrupted — it must be stopped with hard CC such as stuns or knockbacks. Left alone it melts the entire party. The most common cause of death in this section.
- Tempest Channeler: use defensives for Lightning Storm, interrupt Thunder Blast.
- Flamegullet (ground-patrolling elite): Flame Breath frontal — position to the side. Below 50% health it stacks Molten Blood — save damage cooldowns and defensives for the latter half and burst it down.
- Assign a stun rotation for the Flamedancer (interrupts do not work).
- Do not stand and damage near Destroyer corpses.
Section 3 — Upper Overlook (before the final boss)
- Thunderhead (ground-patrolling elite): dodge the Storm Breath frontal. Rolling Thunder debuff — the DoT hits hard, so stagger dispels one player at a time (dispelling everyone at once spikes the healing load).
- Ruinous Stormbringer (CC immune): interrupt Storm Bolt; at 100 energy it casts Thunderstorm, a knockback — do not fight near ledges.
- Kick rotation on Storm Bolt.
- Watch the energy gauge before the knockback and save movement abilities.
Bosses

Boss 1
Melidrussa Chillworn
A frost primalist. The fight revolves around baiting Hailbombs and bursting the whelp phase.
Key Mechanics
 Hailbombs — Spawns ice pillars at party members' positions. Everyone stacks to bait them into the same spot, then moves out together after the cast completes. The standard play is to place pillars from the room's edge inward in one direction, preserving open space. Touching a pillar is still lethal on high keys.
- Frigid Shard — Tank-targeted frost cast — interruptible as of Season 2. Include it in the kick rotation.
 Chillstorm — Marks a random target, then explodes with a pull/knockback (forced movement softened in Season 2). The target moves away from the party and handles it alone.
 Awaken Whelps — At health thresholds, summons multiple Infused Whelps while the boss channels Frost Overload, a party-wide AoE. Killing the whelps quickly ends the channel.
- The whelp phase is effectively the DPS check — line up AoE cooldowns for it.
- Never leave the Hailbomb bait stack — planting a pillar in the wrong spot alone destroys the room's remaining space for later.
Boss 2
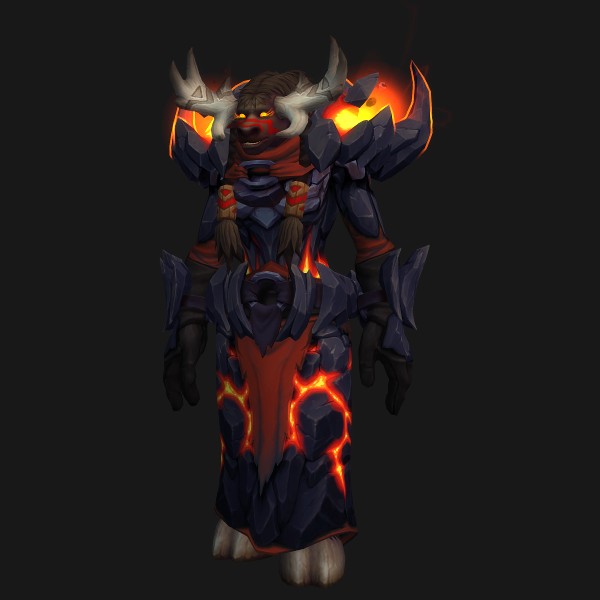
Kokia Blazehoof
A tauren fire primalist. The fight revolves around instantly swapping to the Blazebound Firestorm and managing floor space.
Key Mechanics
 Ritual of Blazebinding — Picks a random target (with a telegraph outline as of Season 2), then summons a Blazebound Firestorm elemental. The target hugs the boss to keep the spawn position tight. Everyone swaps to the elemental immediately and interrupts Roaring Blaze. The elemental leaves a Scorched Earth pool where it dies, so plan where to kill it.
 Molten Boulder — A boulder rolling along a telegraphed direction (with a direction indicator as of Season 2) — being hit deals heavy damage plus a 3-second stun. Steer the boulder's path away from the party's positioning.
 Searing Blows — Tank hit that also stacks the Searing Wounds bleed.
- Instantly swapping to the elemental is the entire fight. Greeding boss damage and ignoring the elemental is a wipe. Assign a Roaring Blaze kicker.
- Boulders and pools shrink the room over time, so save movement abilities for the later phase.
Boss 3
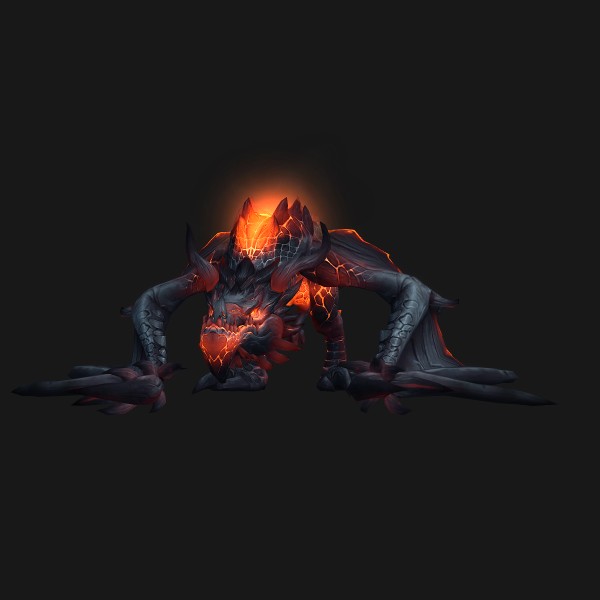
Kyrakka and Erkhart Stormvein
A dragon-and-troll duo boss with two phases. The fight revolves around fire-pool placement and predicting the wind pushes. In phase 1 Kyrakka (the dragon) is airborne and Erkhart (the troll) fights on the ground; at 50% health Erkhart mounts Kyrakka and both fight on the ground.
Key Mechanics
 Infernocore → Inferno Spit (reworked in Season 2) — Kyrakka puts a fire debuff on two random players, leaving fire pools at the impact points. Targets drop them at the room's edge, toward already-burned ground. As of Season 2, Flaming Embers no longer reapplies the debuff, easing the handling.
 Stormslam — Erkhart's tank attack that also applies a stacking nature-damage-taken debuff (magic dispellable).
 Winds of Change — Pushes players and fire pools together in a set direction. The push cycles northwest, southwest, southeast, northeast — read the next wind direction and keep the area the fire will be pushed into clear.
 Interrupting Cloudburst — Interrupts spells mid-cast and locks the school — casters time their casts around it (visibility improved in Season 2).
- Phase 2 (50% health) — Erkhart mounts Kyrakka and both fight on the ground. Inferno Spit now targets 3 players, alongside a Flame Breath frontal — party-wide damage rises sharply, so concentrate healing cooldowns and defensives here.
- Dropping fire pools with the coming wind push already factored in is what separates good players from the rest.
- Do not start long casts around Interrupting Cloudburst. Spread personal defensives across the phase 2 AoE windows.
General Tips
- Midnight Season 2 changes (12.1 retune, per the official test notes of 2026-07): every boss's cast tempo was slowed, reducing overlapping-mechanic pressure, and trash pack compositions were simplified with mob density reduced in some sections.
- Season 2 change: the patrolling elites Thunderhead and Flamegullet no longer fly and patrol on the ground — fewer aggro accidents and accidental pulls. Flashfrost Earthshaper's Tectonic Slam was reworked, easing the cast-bar spam and burst AoE.
- Season 2 boss changes: Melidrussa's Chillstorm knockback is weaker, Frigid Shard became interruptible, and the Infused Whelps' Cold Claws changed from a cast to a melee-attack trigger. Kokia gained a telegraph outline on Ritual of Blazebinding targets and a clear direction indicator on Molten Boulder. Kyrakka and Erkhart's Infernocore chain was simplified into Inferno Spit, Flaming Embers no longer reapplies its debuff, and Interrupting Cloudburst's cast visibility was improved.
- The original Dragonflight version's infamous one-shot Hailbomb tuning was heavily softened in Season 2, but touching a Hailbomb ice pillar is still lethal on high keys.
- Routing conventions: a linear dungeon with little route freedom. As long as section 1 avoids egg-hatch accidents, the count is comfortable. The four Blazebound Destroyers before Kokia are mandatory kills anyway, so the common play is to chain them with nearby packs and AoE them down. The patrolling elites (Thunderhead, Flamegullet) patrol on the ground as of Season 2, making skip decisions easy if you watch their timing.
- Bloodlust timing: a 28-minute timer usually allows 2-3 uses. Convention is once on the first big pull (or Melidrussa's whelp phase) and once on the final boss's phase 2. If the party lacks damage for Kokia's elementals, pulling it forward to Kokia is also valid.
- Common mistake 1: spreading or moving next to dragon eggs, hatching whelps accidentally and chaining Primal Chill freezes.
- Common mistake 2: trying to stop the Flamedancer's Flame Dance with an interrupt and failing (only stuns work).
- Common mistake 3: taking Hailbombs spread out, turning the whole room into a field of ice pillars.
- Common mistake 4: ignoring Kokia's Firestorm elemental (no priority swap), draining the healer's mana under stacking Inferno damage.
- Common mistake 5: dropping fire pools on the final boss without checking the Winds of Change direction, so the wind pushes the fire onto the melee camp.
- Common mistake 6: falling off a ledge to the Stormbringer's Thunderstorm knockback.
- Naming note: boss and major ability names follow Blizzard's Korean hotfix notes and Korean community usage in the Korean version. Some trash mob names and new Season 2 names (Inferno Spit) have no confirmed official Korean names and were left with English alongside (insufficient information).