Midnight
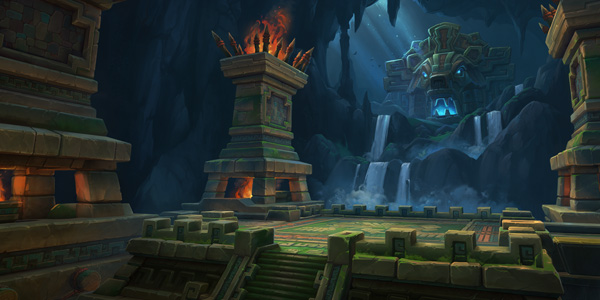
Den of Nalorakk
Timer 32 min3 bossesThe timer (32 minutes) is generous, but this is a mechanics-execution dungeon with repeated soak mechanics on every boss.
The den of Nalorakk, the Loa of War, lies south of Zul'Aman. Heroic-only in Season 1, it joined the Mythic+ pool in Season 2. It is a linear dungeon with three bosses in fixed order (The Hoardmonger, Sentinel of Winter, Nalorakk) and no skip routes. Before the first boss you must gather offerings (fruit, fish, apple barrels), and this placement mechanic is reported to occasionally bug out and cost keystone timer. Two Warding Incense spots grant a 5% Versatility buff for 10 minutes to characters with Druid or Alchemy skills, and Night Elves, Trolls, and Bear Form Druids can interact with props (Rune of Anchoring type) for a 15-minute buff reducing forced-movement effects by 50%.
Researched early in the season. Unconfirmed details are marked as such in the text.
Trash
| Must-Interrupt — Spell | Caster |
|---|---|
 Healing BreezeHeal — top-priority interrupt on every cast; spellsteal or purge it if missed. Earth Bolt is second priority. Healing BreezeHeal — top-priority interrupt on every cast; spellsteal or purge it if missed. Earth Bolt is second priority. | Earthwhisper Tender |
 ScavengeCast near fruit bushes to steal offerings — interrupt it. ScavengeCast near fruit bushes to steal offerings — interrupt it. | Keen-Eyed Striker |
 Frigid RoarTop-priority interrupt on every cast. Frigid RoarTop-priority interrupt on every cast. | Frigid Mauler |
 Arc LightningTop-priority interrupt on every cast — never let one through. Lightning Bolt is second priority. Arc LightningTop-priority interrupt on every cast — never let one through. Lightning Bolt is second priority. | Stormbound Mystic |
 Lightning BoltRandom target — keep a kick rotation going. Lightning BoltRandom target — keep a kick rotation going. | Loa Speaker Nanea |
 Winter's ShroudAdds summoned by Sentinel of Winter — interrupt as much as possible while bursting them down. Winter's ShroudAdds summoned by Sentinel of Winter — interrupt as much as possible while bursting them down. | Fractured Shivercore |
Dispels
- Glacial Torment (Sentinel of Winter) — top-priority magic dispel; spot-heal anyone who cannot be dispelled
- Toxic Spores (The Hoardmonger) — stacking poison, dispellable; stacks every time someone soaks a Spoiled Mushroom
- Cryo Surge (Glacial Revenant) — magic, dispellable
- Razor Dive (Keen-Eyed Striker) — stacking bleed, be ready to remove bleeds
- Spirit of Hunger debuff — requires a curse dispel
- Mother's Wrath (Territorial Matriarch) — soothe or enrage dispel
- Bloodrush (Frostfang) — 10-second enrage right after the pull; soothe or enrage dispel
- Bestial Wrath (Bonded Beasttamer) — enrages itself and its Loyal Saberfang; soothing is mandatory
Section 1: Before The Hoardmonger (offering collection)
- The first boss only spawns after you gather six offerings (fruit, fish, apple barrels) scattered around the area.
- Keen-Eyed Striker: Razor Dive stacking bleed on random targets. Casts Scavenge near fruit bushes to steal offerings — interrupt it.
- Thornclaw Gatherer: Shredding Claws, a stacking armor reduction on the tank, plus rotten-supplies ground effects on random targets.
- Earthwhisper Tender: Healing Breeze (heal) is the top-priority interrupt on every cast; spellsteal or purge it if missed. Earth Bolt is second priority.
- Spirit of Hunger: immune to CC. Feast of Misery channeled AoE damage plus a Starvation Effigy totem — burst the totem immediately. Also applies a debuff that needs a curse dispel.
- Territorial Matriarch: gains a stacking Mother's Wrath enrage each time a cub dies — soothe or dispel the enrage, and the tank should have a defensive ready.
- Assign a fixed kick rotation for Healing Breeze.
- Swap immediately to burst totems (Starvation Effigy).
Section 2: Before Sentinel of Winter (snowfield)
- Environmental mechanic — Harsh Winds: a damaging wind blows across the whole section. Advance by sheltering behind snow-free terrain pieces; killing The Winter Squall stops the wind damage.
- Frostfang: Bloodrush, a 10-second enrage right after the pull — soothe, dispel the enrage, or use tank defensives.
- Terra Rumbler: pulses AoE damage while its Rumbling Ward shield is up — focus it down when the shield appears.
- Frigid Mauler: Frigid Roar is a top-priority interrupt on every cast.
- Glacial Revenant: Cryo Surge frontal damage — spread loosely; it is magic-dispellable. Avoid the snowdrift ground effect it leaves on death.
- Avatar of Determination: immune to CC. Glacial Tomb roots the entire party — attack the ice to break it or use immobilize-removal effects. Move out of the Pulverize AoE impact zone.
- The Winter Squall: immune to CC, with Harsh Winter, a persistent AoE aura — killing it alongside other mobs strains healing badly, so kill it first.
- Assign a fixed kick for Frigid Roar.
- On Glacial Tomb roots, swap immediately to breaking the ice.
Section 3: Before Nalorakk (troll casters)
- Stormbound Mystic: Arc Lightning is the top-priority interrupt on every cast; Lightning Bolt is second priority.
- Ruthless Totemcaller: destroy its Magma Totem the moment it is summoned.
- Grizzled Warbringer: immune to CC. Dodge the Poison Spear Volley ground effects and use defensives for Primal Echo AoE damage.
- Bonded Beasttamer: uses Bestial Wrath to enrage itself and its Loyal Saberfang — soothing is mandatory. Watch out for Reposition, which drags mobs around.
- Loyal Saberfang: stacking Shred Armor on the tank — use defensives or kite at high stacks.
- Loa Speaker Nanea: CC-immune mini-boss. Keep a kick rotation on her random-target Lightning Bolt; the two Earthquake targets should leave the party and drop the effect stacked on existing zones; destroy the Volatile Totem immediately (left alone, its AoE damage overwhelms the healer).
- Never let an Arc Lightning through — kick rotation is the top priority.
- Swap immediately to burst both totems (Magma and Volatile).
Bosses

Boss 1
The Hoardmonger
A boss that empowers itself by consuming resource piles (meat, bones, mushrooms). At health thresholds (sources disagree — listed as 90/60/30% or 90/70/40%) it casts Resourceful Measures to eat one pile and empower the matching ability. The party can largely control which pile gets eaten; the community-recommended order is meat, then bones, then mushrooms (the mushroom empowerment is the most dangerous, so save it for last).
Key Mechanics
 Earthshatter Slam — Frontal smash — move out of the cast direction. When bone-empowered it becomes Bonespike Slam, a frontal on a random target that leaves ground effects.
 Ravenous Bellow — Party-wide AoE damage. When meat-empowered it becomes Hearty Bellow, adding a knockback and a DoT.
 Spoiled Supplies — During the channel, many Spoiled Mushrooms (green circles) spawn on the ground. If not soaked (stepped on) within 12 seconds they explode with Putrid Burst. Each mushroom soaked applies Toxic Spores (stacking poison, dispellable), so split them across the party. When mushroom-empowered, more mushrooms spawn.
- When splitting mushrooms, pop a personal defensive if your stacks are high.
- Do not hold burst just before empowerment thresholds to rush past phases — cooperate on pile order so the dangerous pile (mushrooms) is not left over.

Boss 2
Sentinel of Winter
The arena is an ice sheet, so movement slides. Add management and soak mechanics are the core of the fight.
Key Mechanics
 Glacial Torment — A frost DoT on targets that grows stronger every 2 seconds (roughly 16-second duration per sources) — top-priority magic dispel. Spot-heal anyone who cannot be dispelled. Targets should spread 10-12 yards.
 Raging Squall — Multiple tornado ground effects — the standard play is to stack up to bait the tornadoes into one spot, then rotate clockwise around the room to keep a safe zone open.
 Shattering Frostspike — A circular ground effect plus two Fractured Shivercore adds. Interrupt the adds' Winter's Shroud casts as much as possible while bursting them down. Adds leave a Snowdrift ground effect where they die, and when Rimeshatter soak circles (small white circles) appear, each player soaks one to prevent the Rime Detonation explosion.
 Frozen Tempest — A channel with persistent AoE damage and a push-back effect. Standing on a Snowdrift left by a dead add grants immunity to the push-back — timing add kills to line up with this channel is the key to the fight.
- Swap to adds the moment they spawn and interrupt Winter's Shroud.
- Follow the one-player-one-circle rule on soaks, and follow stack/movement calls to bait the tornadoes.
Boss 3
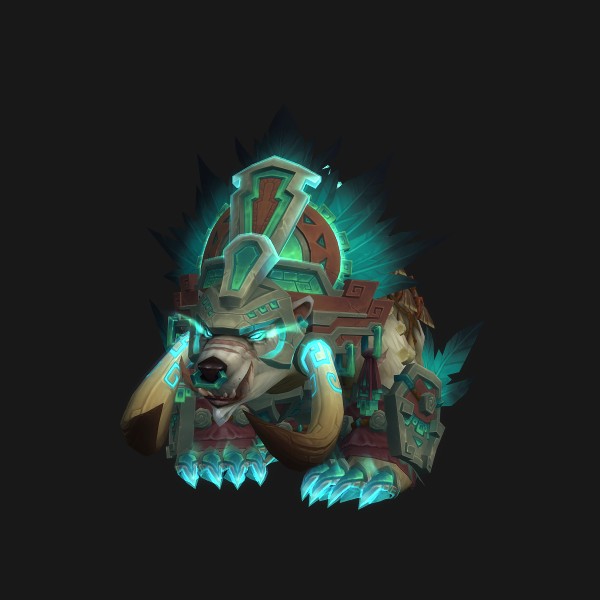
Nalorakk
The Loa of War himself. An escort-style fight protecting the friendly NPC Zul'jarra in the center of the room. The core mechanic is body-blocking the shadowy bear echoes that charge toward Zul'jarra in the center.
Key Mechanics
 Echoing Maul — Debuffs three players — after a delay, a shadowy bear echo spawns at each player's position. Stack and drop them near existing echoes (edges and corners), but be careful not to expose allies to the echoes' melee damage (Spectral Slash). The tank must never face their back toward the echoes.
 Fury of the War God — The placed echoes charge toward Zul'jarra in the center. The party forms a wall around the boss (Zul'jarra) and body-blocks the charge paths. Each block deals a small amount of nature damage (Echoing Fury) — use defensives.
 Overwhelming Onslaught — Nalorakk leaps behind the tank, creates a shield (cover), and unleashes three party-wide AoE hits — everyone moves behind the shield. Healers prepare for three big damage events.
 Forceful Slam — A tank-targeted smash (soak) right after Overwhelming Onslaught — after the knockback, the tank must return quickly to take it.
 Demoralizing Scream — Party-wide damage triggered whenever Zul'jarra is hit by Forceful Slam or a charging echo — the escort-failure penalty. Preventing it through echo blocking and quick tank returns is the entire strategy.
- Mighty Roar (per Korean sources) — Korean sources mention Mighty Roar (physical damage across the den plus a 3-second push-back) and a pattern that spawns clones at each player's position dealing AoE damage nearby and knocking back anyone who approaches (drop clones as far toward the edges as possible) — this appears to be a Korean description of the same mechanic as the Echoing Maul patterns above.
- If targeted by Echoing Maul, drop the echo in the designated corner and return.
- Do not abandon your assigned lane during the charge phase — one missing blocker means Zul'jarra gets hit and the party-wide damage goes out. Use a personal defensive before blocking.
General Tips
- Routing: a linear dungeon with no skips. Clean pack-by-pack clearing beats forced giant pulls, and caster packs (especially the section before the last boss) need kick rotations assigned in advance. Method's PUG MDT route: https://wago.io/b69_rKkRL
- Bloodlust timing: no definitive standard timing confirmed across sources (insufficient information). Community practice often uses it on the final boss Nalorakk, where soak and escort mechanics overlap, or on Sentinel of Winter where add bursting is a DPS check — judge by party composition.
- The Hoardmonger: leaving Spoiled Mushrooms unsoaked causes chained Putrid Burst explosions, and one player hoarding mushroom soaks can die to Toxic Spores stacks.
- The Hoardmonger: failing to manage pile order and taking the mushroom empowerment early is a common mistake.
- Sentinel of Winter: failing to sync add kills with Frozen Tempest and eating the channel without a Snowdrift (push-back immunity), or ignoring Rimeshatter soak circles, are frequent wipes.
- Nalorakk: failing to hide behind the shield during Overwhelming Onslaught, the tank returning late for Forceful Slam so Zul'jarra takes it instead, or missing a charging echo and triggering Demoralizing Scream are the common mistakes.
- General: the pre-boss offering placement mechanic is reported to bug and cost time, so split offering collection among party members and handle it quickly.
- Entry requirements: level 80, unlocked by completing the Unforgiven quest or reaching level 88.